

Learn the easiest and most effective ways to create a landing page in WordPress. Check out different types of landing pages and step-by-step procedures to build one
You landed here because you are looking for the easiest ways to building a landing page on a WordPress website, right?
After reading this article, let me assure you that you will create a website landing page using three methods without using HTML, CSS, or PHP know-how.
These are the three most convenient ways to create a landing page in WordPress, even as a novice.
Let’s quickly get down to the show and tell you what a landing page is and what you should look into while creating a landing page from scratch.
What is the purpose of a landing page?
A landing page explicitly targets the audience to convert them into customers by generating leads or selling products/services for a business.
Landing pages are an essential part of paid marketing, email, and social media marketing, where visitors land on the landing page using different paid or third-party traffic sources.
Moreover, landing pages always perform good results because they target sole purpose instead of the website’s homepage designed to display loads of information in one place.
The purpose of the landing pages is to provide information about a product or service to help the audience making a purchase decision. Interestingly, you can create more than one landing page for different campaigns. Such as;
- Build a landing page for your paid advertisement campaigns, Facebook ads, Google ads
- Build a landing page for your subscribers visiting your site from an email list, Facebook, Twitter, or Instagram feeds.
- Create a separate landing page for your different products and services
Now, let’s head for the first method and find out how to create a website landing page in WordPress.
Method 1: Building a Landing page in WordPress with Elementor (step by step)
If you are looking for creating a landing page in WordPress for free, we got your back with Elementor page builder. You can easily make any landing page in WordPress with Elementor page builder, which is free to download and also comes with more advanced features in the pro version. Here are the steps to be taken.
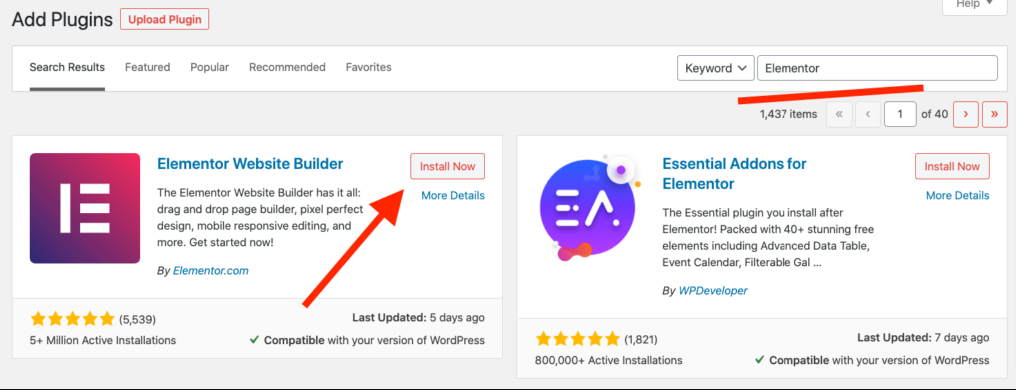
Step 1: Install Elementor page builder
Installing Elementor is easy; log in to your WordPress website and open your Dashboard.
- Go to Dashboard > plugins
- Plugins > Add New Plugin
- Search for Elementor page builder in the search bar
- Click install and then activate
Step 2: build your landing page with Elementor
Create a New Page from your Dashboard as usually, you create a page, then click on the “Edit with Elementor.”

This will lead you to the Elementor page builder editor, where you will get the options to edit your landing page.
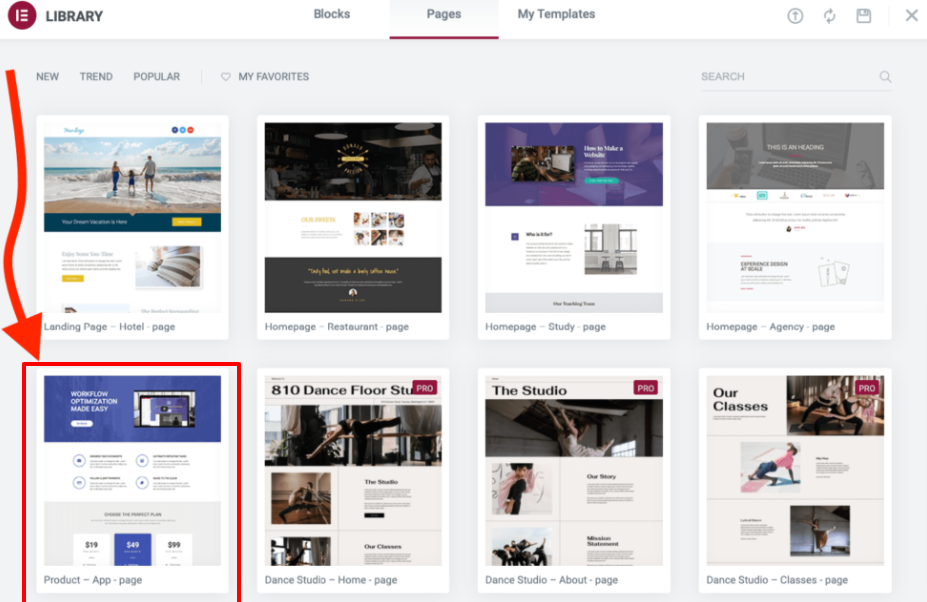
With Elementor, you can build your landing page in two ways;
- Create a landing page from scratch using Elementor’s widgets and elements.
- Import a pre-built template from Elementor’s library.
We’ll use the pre-built template to speed up the landing page designing process. Here is the template I’m going to use on my landing page.
import any of the templates you find most relevant to your brand’s voice, then edit any element in your desired way.
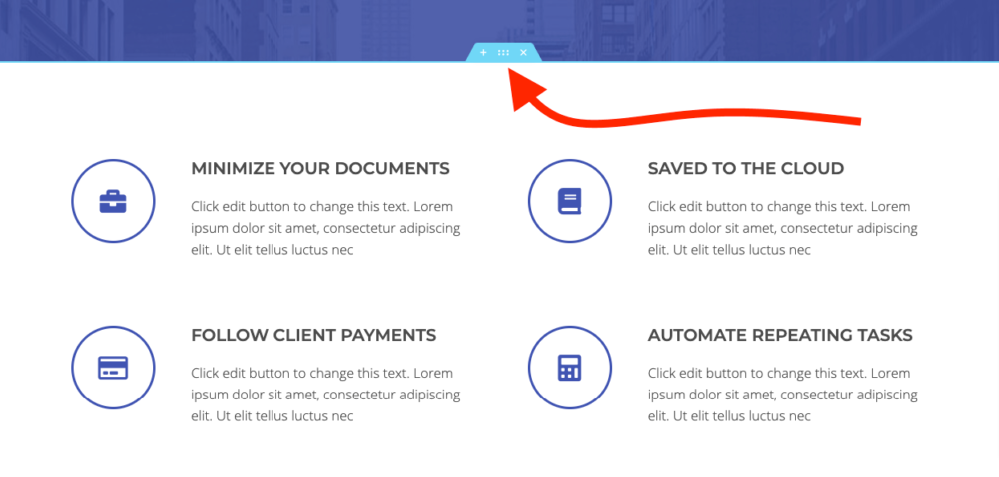
Step 3: personalize Landing page with Elementor
Click on any of the page’s sections to edit it. For instance, if you are not satisfied with the pre-built section’s alignment, you can click on the six-dot icon and drag and drop the section in your preferred way.
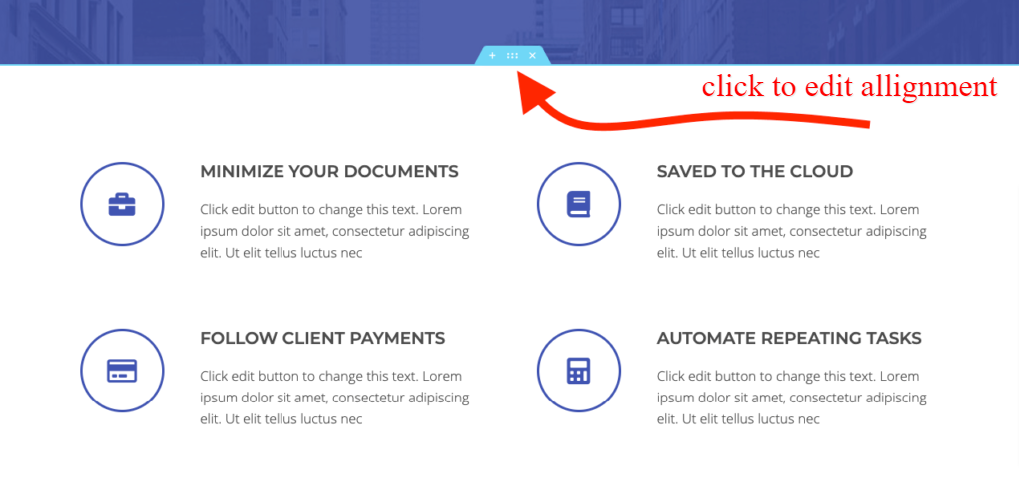
You can edit any section setting from the left-hand editing panel. Also, you can remove any of the sections using the “x” icon. When you click on any element, its editing interface will appear in the left sidebar wherefrom you can edit.
Same way, you can replace text, images. Once you click on the image, its respective toolbox will appear right above it, and upon clicking on it, it will show the library icon where you can select and upload an image.
Another thing that you would like to edit is each section’s styling options – like background color, fonts, typography.
To adjust the styling options of each section, click on the same six dot icon, and a setting area will appear in the sidebar. When you click on the style tab, it’ll open the setting area of
- Background of each section
- Background position
- Borders
- typography
step4: How to add new content to your landing page in WordPress
you can also edit the template’s content, pick any new content element from the catalog, and add it to your landing page. Just click on the + sign above the section, and you’ll see a list of new content blocks in the sidebar.
Drag and drop your desired elements as you like and edit the main settings from the Layout tab.
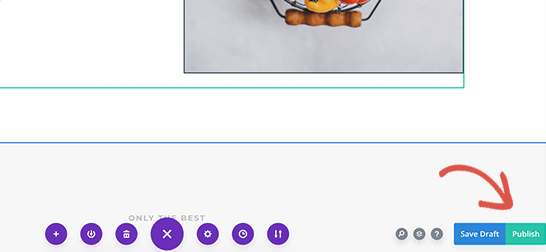
Step 5: Finally, Save and publish your Landing page
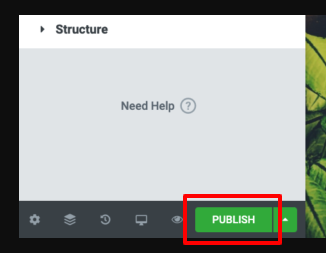
Once you are done with the settings and satisfied with the final version, click on the Publish button on the left bottom, and your landing page is ready to go live.
Method 2: Building Landing Pages with SeedProd in WordPress
Another most straightforward way to create a landing page is using a WordPress Plugin “SeedProd.” SeedProd is a wonderful landing page builder with a drag and drop builder that helps create high-converting landing pages with a live preview option. Moreover, it comes with premade landing page templates to help you quickly start over and build landing pages without designing knowledge. Also, if you are on a limited budget and looking out for ways to create a landing page in WordPress for free, then SeedProd can help you create your landing pages for free.
Installing SeedProd to your WordPress site
Download the SeedProd plugin to your pc and then upload and activate your site.
Go to Dashboard > plugins > Add New Plugin > upload and activate.

Following these steps, you can easily install SeedProd. Next, you’ll find a welcome screen where you’ll put in the license key to activate the plugin.
Next, you will enter into a landing page dashboard where you can set up a landing page. You’ll see four options
- Coming soon mode
- Maintenance Mode
- Login page
- 404 Page
Step 2: Creating a landing page with SeedProd Plugin
To create a landing page, click on the “Add New Landing Page,” you can also import pre-built landing page templates. Also, you can go with a blank page to create your landing page from scratch using the visual editor. The premade templates are
- Thank You
- eCommerce
- Lead pages
- Maintenance Mode
- 404
- Sales Page
- Login pages
- Coming soon
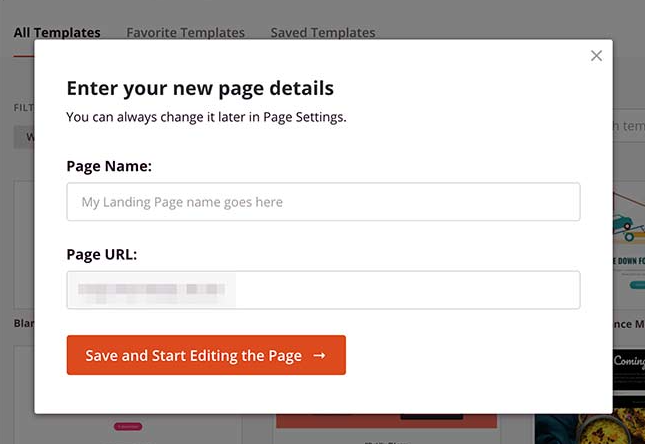
After selecting your desired template, a pop-up will appear where you can put your landing page name and URL.
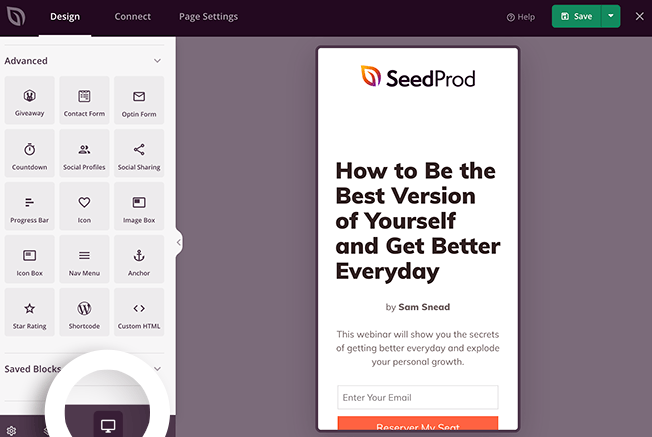
Step3: personalize your landing page using SeedProd
When you have downloaded a landing page template, you’ll see a visual drag and drop page builder to help you create your landing pages content. On the left side menu, you will see two types of elements; Blocks and Sections.
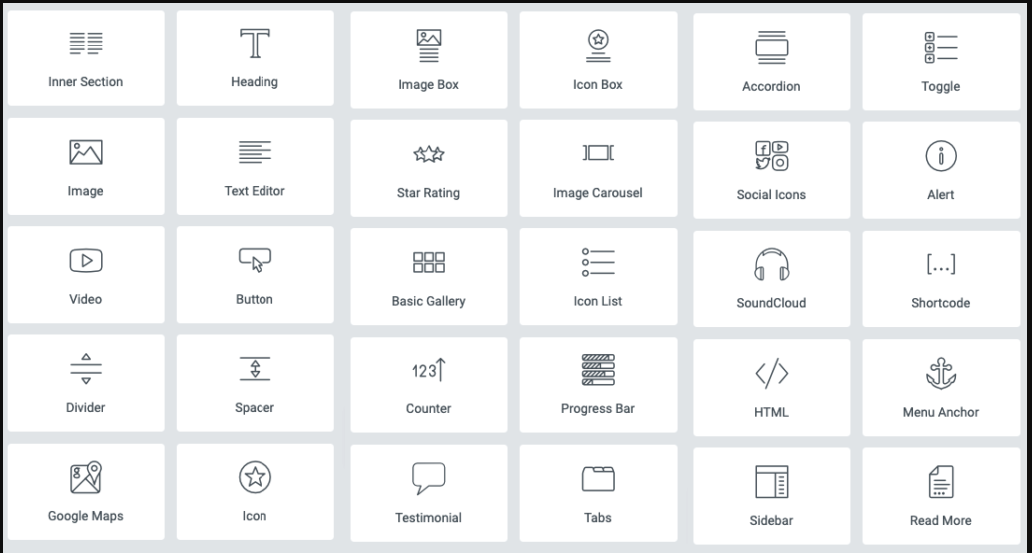
Blocks are the elements you can add to your landing page, such as;
- Videos
- Spacers
- Bullet Point Lists
- Images
- Buttons
- Headlines
- Text
- Dividers
- Columns
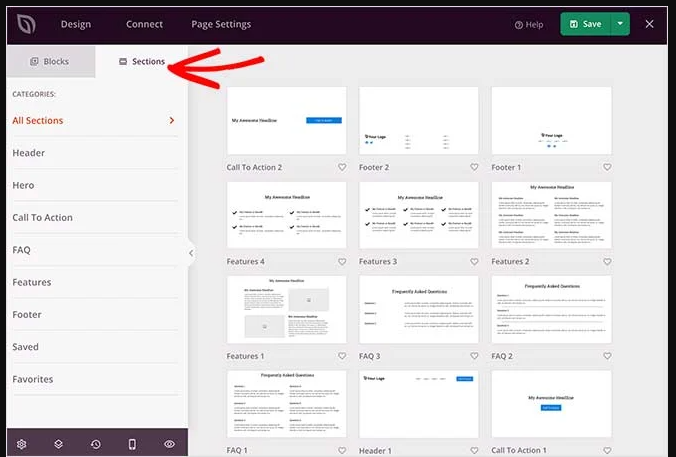
While the Sections are the premade blocks of layouts you can add to your landing page. The best part is creating a landing page for your products because SeedProd is fully compatible with WooCommerce. Therefore, it can help you create eCommerce landing pages and promotional pages to get more sales or event advertisements.
The WooCommerce blocks in SeedProd include cart buttons, checkout, featured products, and product grid. You can customize the WooCommerce theme using these options and create stunning marketing campaigns with SeedProd.

Adding sections is easy, and you can add as many sections as you like to your landing page by clicking on the + sign on each section.
These sections are easily customizable, and you can change the background, typography, and more.
Step 4: Add Email marketing service
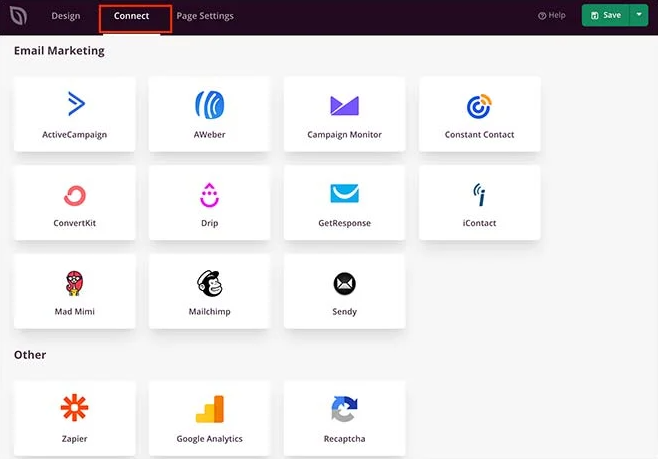
With SeedProd, you can connect your email marketing services to collect more leads. SeedProd supports AcitiveCampaign, Get Response, Constant Contact, and many other email marketing services.
Step5: configure your general landing page settings
Click on the Page settings on top of the screen to edit general page settings, SEO optimization, and analytics settings. You can also tailor the header and footer section from here.
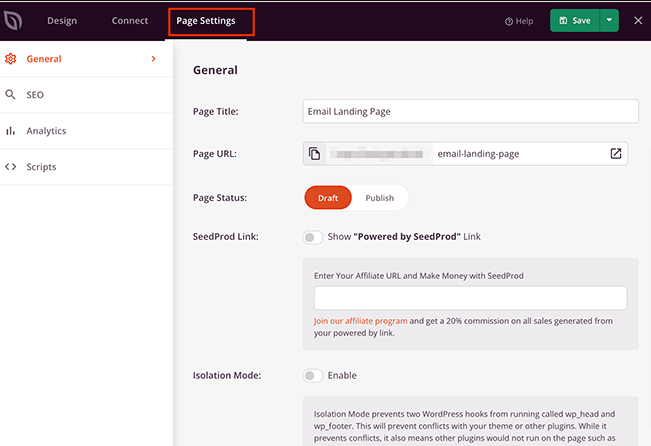
Click on the Save button once you are done with all of the settings.
Step5: Publish your page
Before publishing your page, preview its mobile version to see if it looks perfect in mobile mode or not.
If everything looks OK, then hit the publish button, and your landing page is ready to go live.
Method 3: How to Build a Landing Page in WordPress using Divi
Divi builder comes with a Divi theme, or you can install it as an independent page builder to create your landing page.
If you have already installed the Divi theme, there is no need to install Divi builder because it comes with the Divi theme. Simply activate the Divi page Builder.
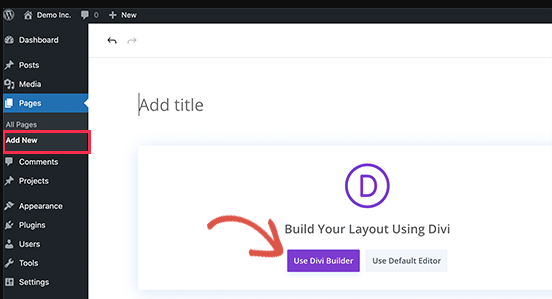
When you have activated Divi builder, go to the Dashboard > Pages > Add New Page.
You can see the button “use Divi builder” button and enter it into the Divi builder editor.
Next, you’ll find options to start with your landing page; Build from scratch, Choose a premade template or clone an existing page.
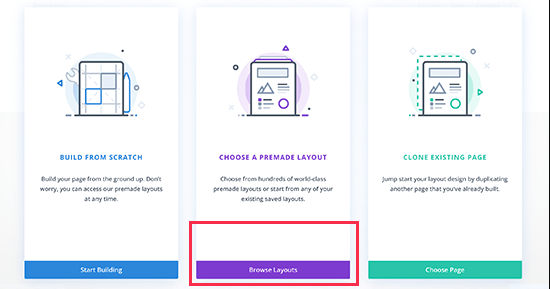
Divi is packed with readymade templates to give you a quick starting point. Import any of the ready-to-use Divi templates and customize them.
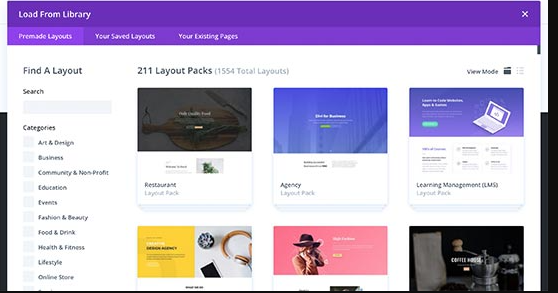
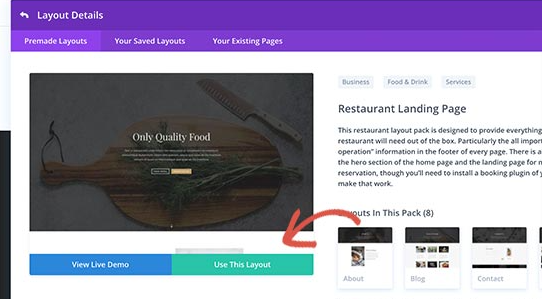
When you click on any of the desired templates, it’ll open different layouts related to that template. Suppose you are looking for a landing page for Restaurant; upon clicking the landing page template, it’ll open different layouts related to the Restaurant theme. Select the template you want to include by clicking the “use this layout” option to continue.
After that, Divi builder will download and activate the layout you have selected from the library. Once installed, you can preview the template inside the page builder
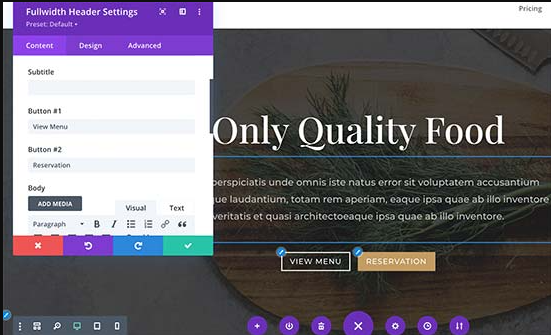
Now, you can click on the element on the screen and start editing it. Suppose you want to edit the text in the element, then simply click on the text and start typing your text.
For other elements, you’ll find different customization options in the pop-up that appear right beside the element.

If you like to add any new section or element, you can add using the + sign. Also, add as many rows, sections, or elements as you like using + sign and then customize after inserting these elements.
Using the advanced editing options, edit any corner of your landing page and once you are done with the editing, hit the save and then publish button to go live.
You can view the live version of your landing page when you click on the Exit Visual builder in the top toolbar options. If you like to edit again, click on the Enable visual Editor to resume editing from the top.
How to create a static landing page in WordPress?
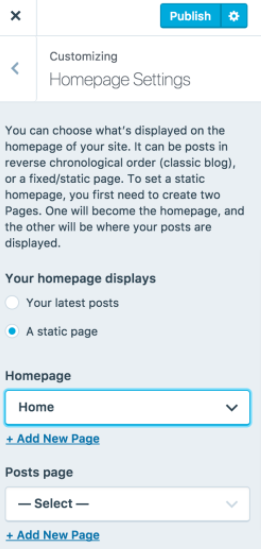
When you have created your landing page using any of these tools, next, you have to make sure that your visitors land on this landing page. To do that, you have to go to the Customizer from Dashboard
And then open the Homepage settings. Click on the “A static page” and select the landing page that you have created from the dropdown Homepage menu. Now, you can open the preview tab and see that it displays your landing page as the front page of your website.
Wrapping up
We hope you’d have a clear idea for creating a landing page for your business. Although there are plenty of choices to design a landing page for your WordPress site, our ambition is to give our readers the most convenient and affordable solution to create a landing page. They can enable them to create any landing page without using any coding knowledge.
Some other landing page creations include Leadpages, Thrive, Builder, Instapages, Unbounce, and Click Funnels. If you want to try some more options, go with any of these builders; however, in my view, the best and easy-to-use options are still Elementor, SeedProd, and Divi. Let us know in the comment section which one is your favorite one and why? Over to you now.
